
Design Case Models in Mendix Studio Pro
Introduction
Start the modeler
When you want to add a case model to your Application - go to the domain model and right-click on a persistent entity. That gives a context menu with starting the modeler.
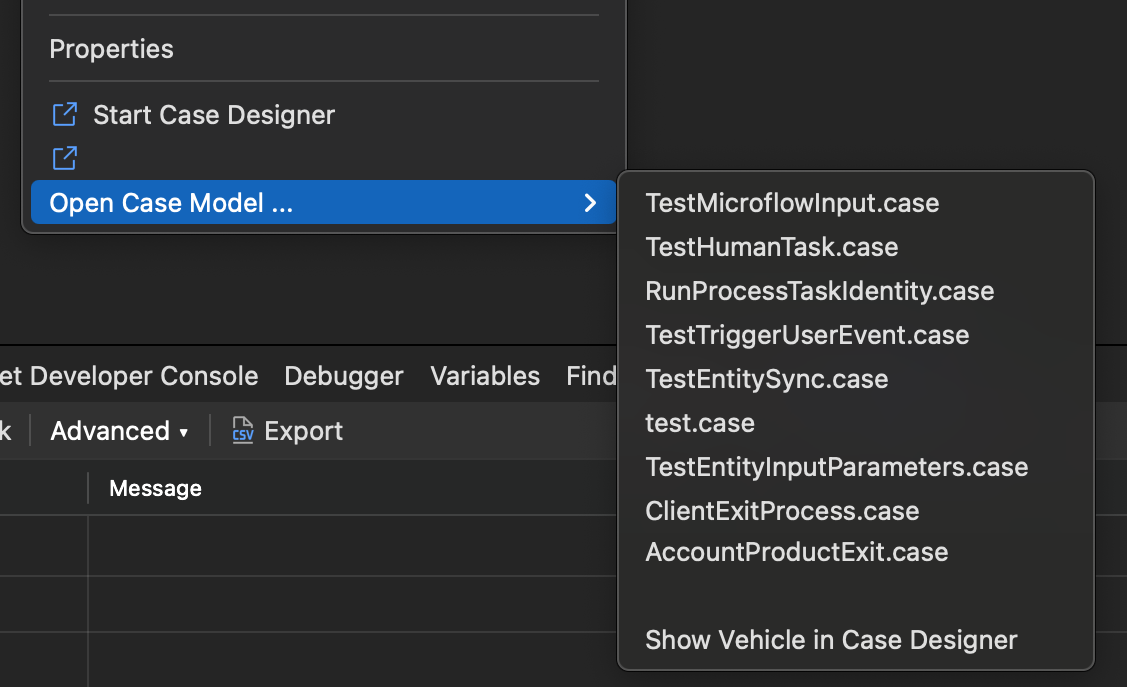
As you see at the end of the context menu, you are able to start the modeler with the 'Case Management' option or start the modeler with a specific Entity as root case file type.
With the modeler started you can start building a model. The designer section gives more information how to use the modeler and build a model.
Entities as Case File elements
The Case File structure inside a case instance is a JSON based (tree) structure. The Entity structure is Relational based (ERD)
Relational Database structures may refer to eachother circularly that is not possible with a tree based structure. To ensure compatabily between Entity and Case File, you need to select the parts of the Entity and its associations become part of the Case File.
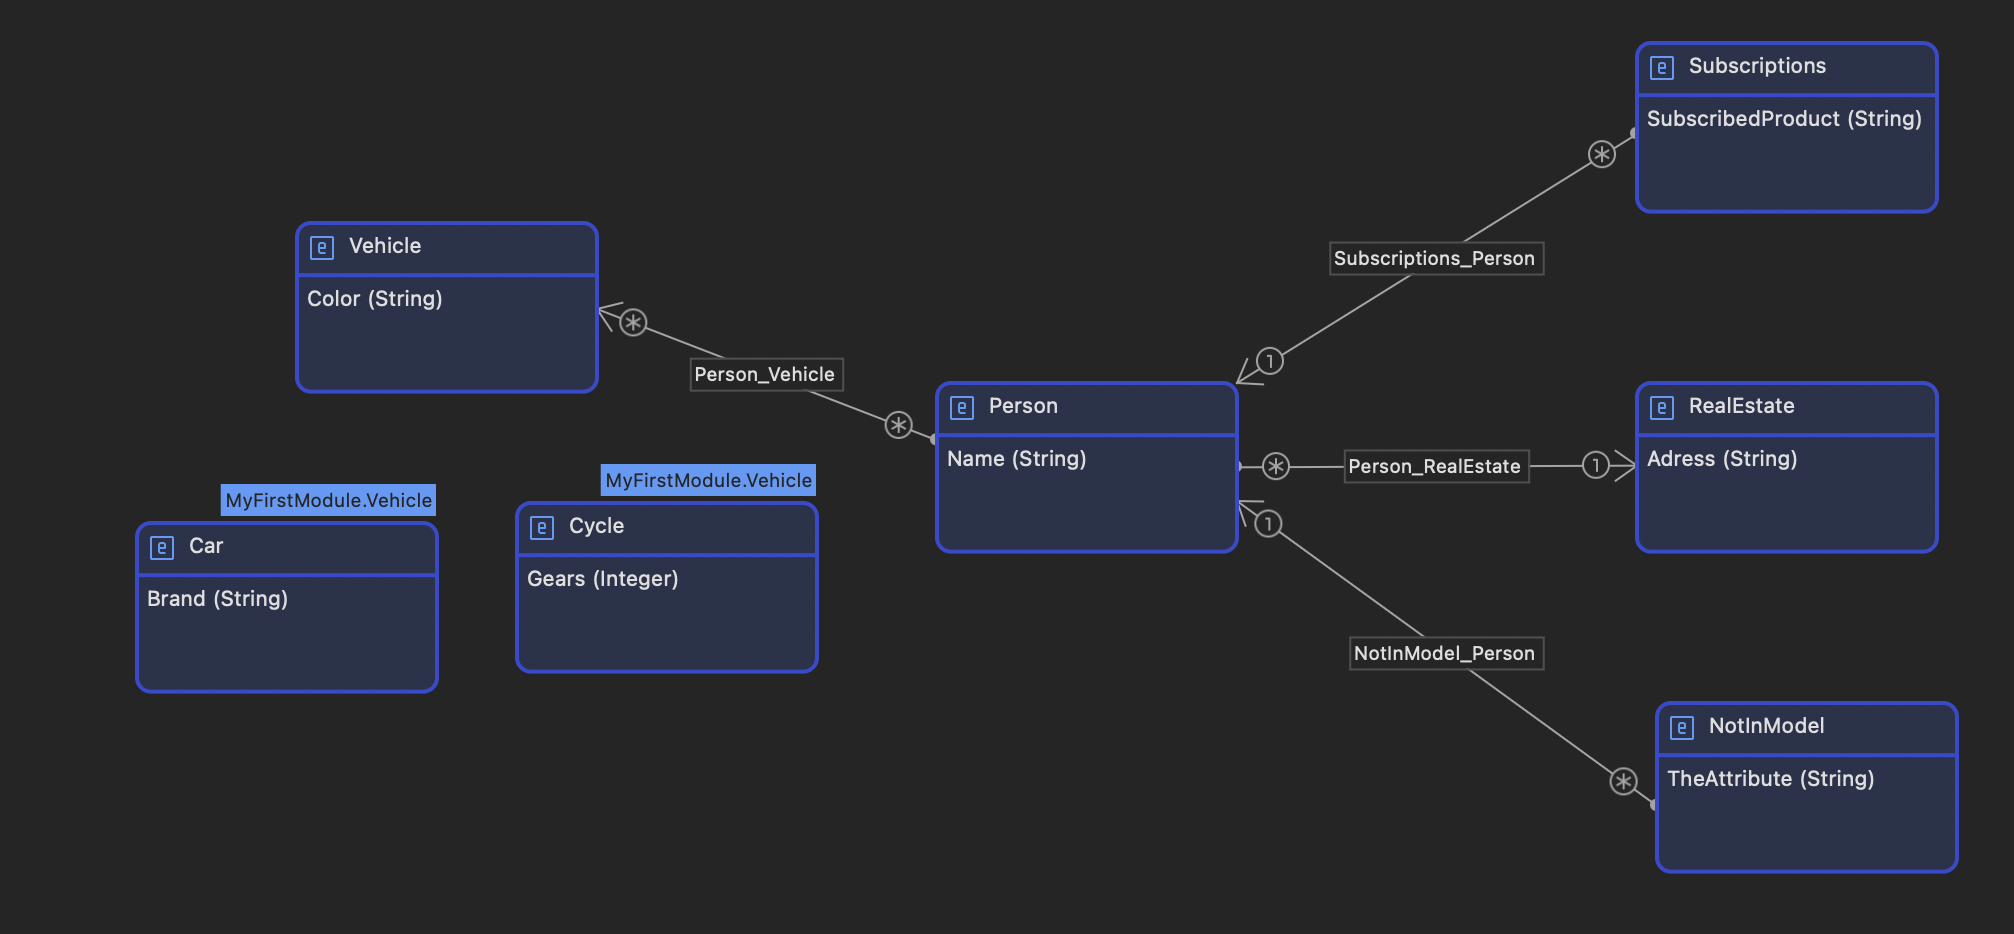
Below we have a sample (test) model of a Person with different types of associations.
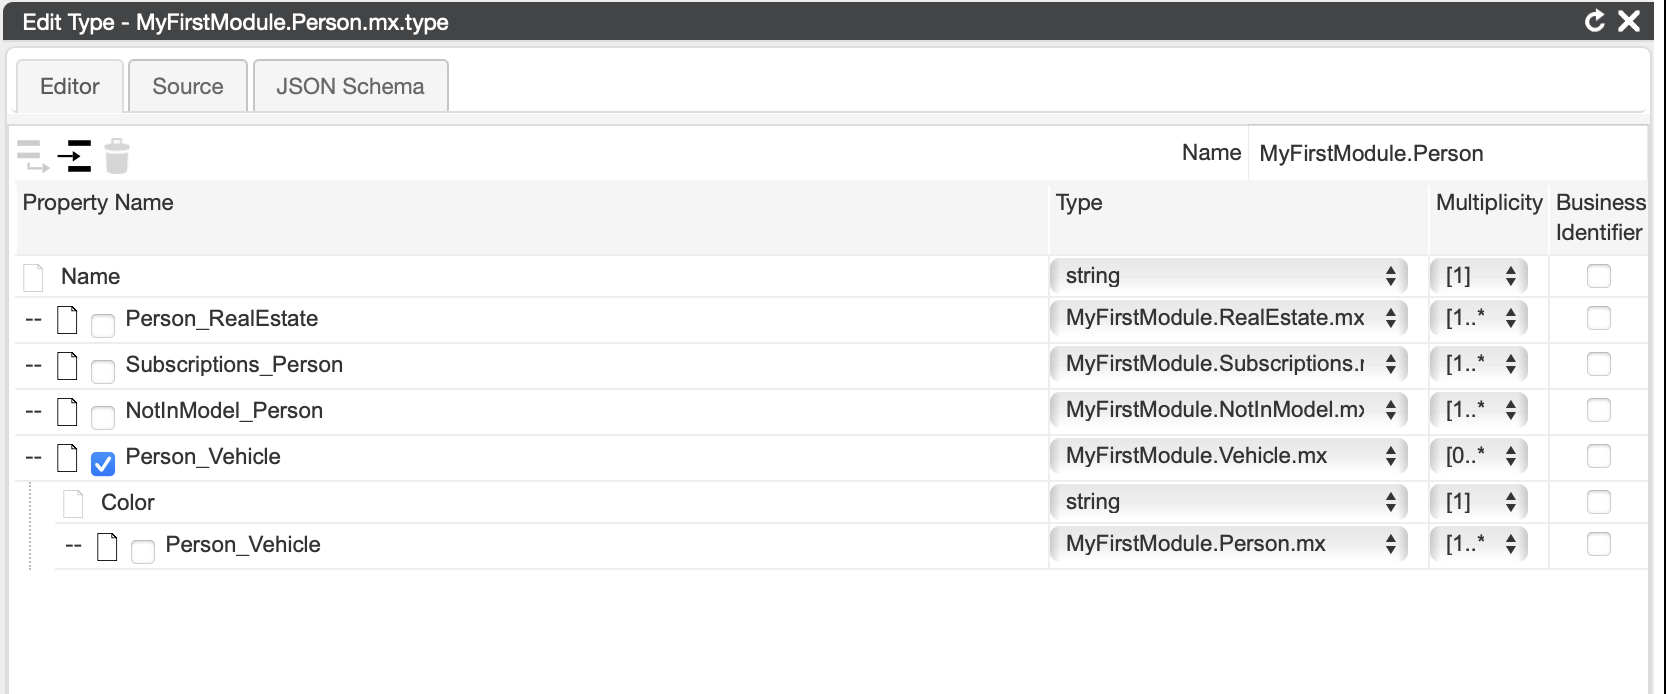
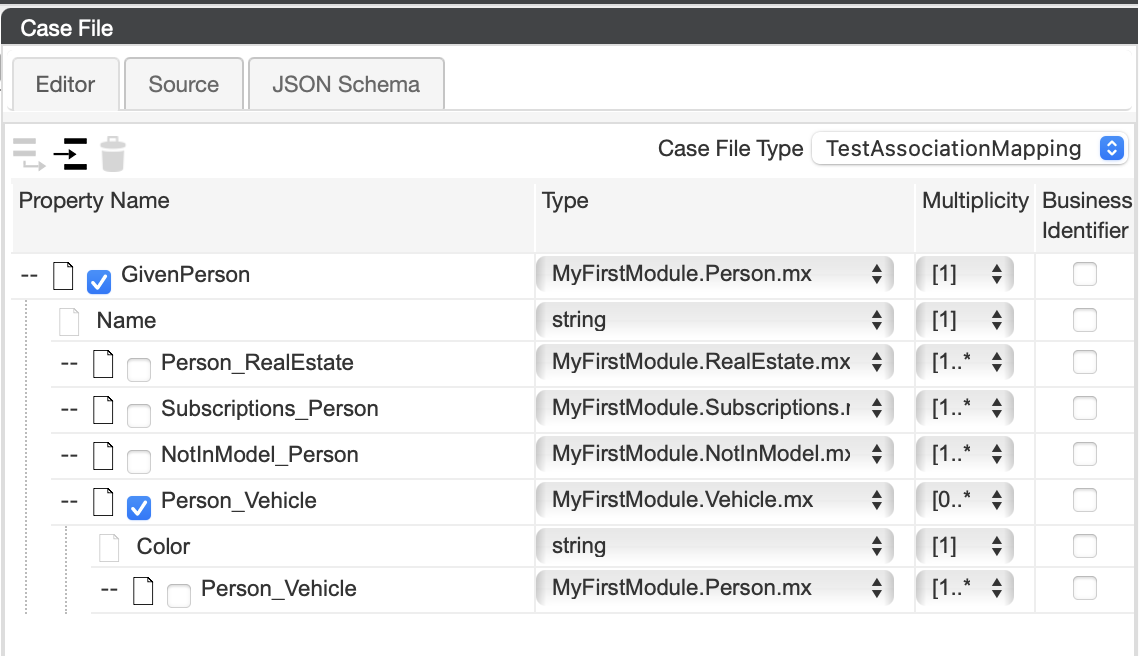
As you can see below, there is an option to checkmark the part of the Entity structure you like to use. The schema below uses the MyFirstModule.Person type in a field named 'GivenPerson' and the connected vehicles are part of the model. The other associations are not used or available in the case file.
The next thing you see is that it is possible to select '.MX' types as type for the case file item. These are the Mendix entities availble in the various domain models. Multiplicity is selected due to the association settings and business identifiers are not (yet) available for the DCM plugin.
Note on Inheritance
It is possible to define inheritance and its available in the case file. When you refer to the base Entity (Vehicle in this example), you can only use Vehicle properties in your case file model. See the Person case file model above: It is possible to select the vehicle color but it is not possible to make use of the Cars brand or the Cycles Gears.
Currently the specific elements (Car, Cycle) are serialized into the case file, they are not recognized as types
Using Pages as Human Tasks
All pages available in your App are available as Human Tasks.
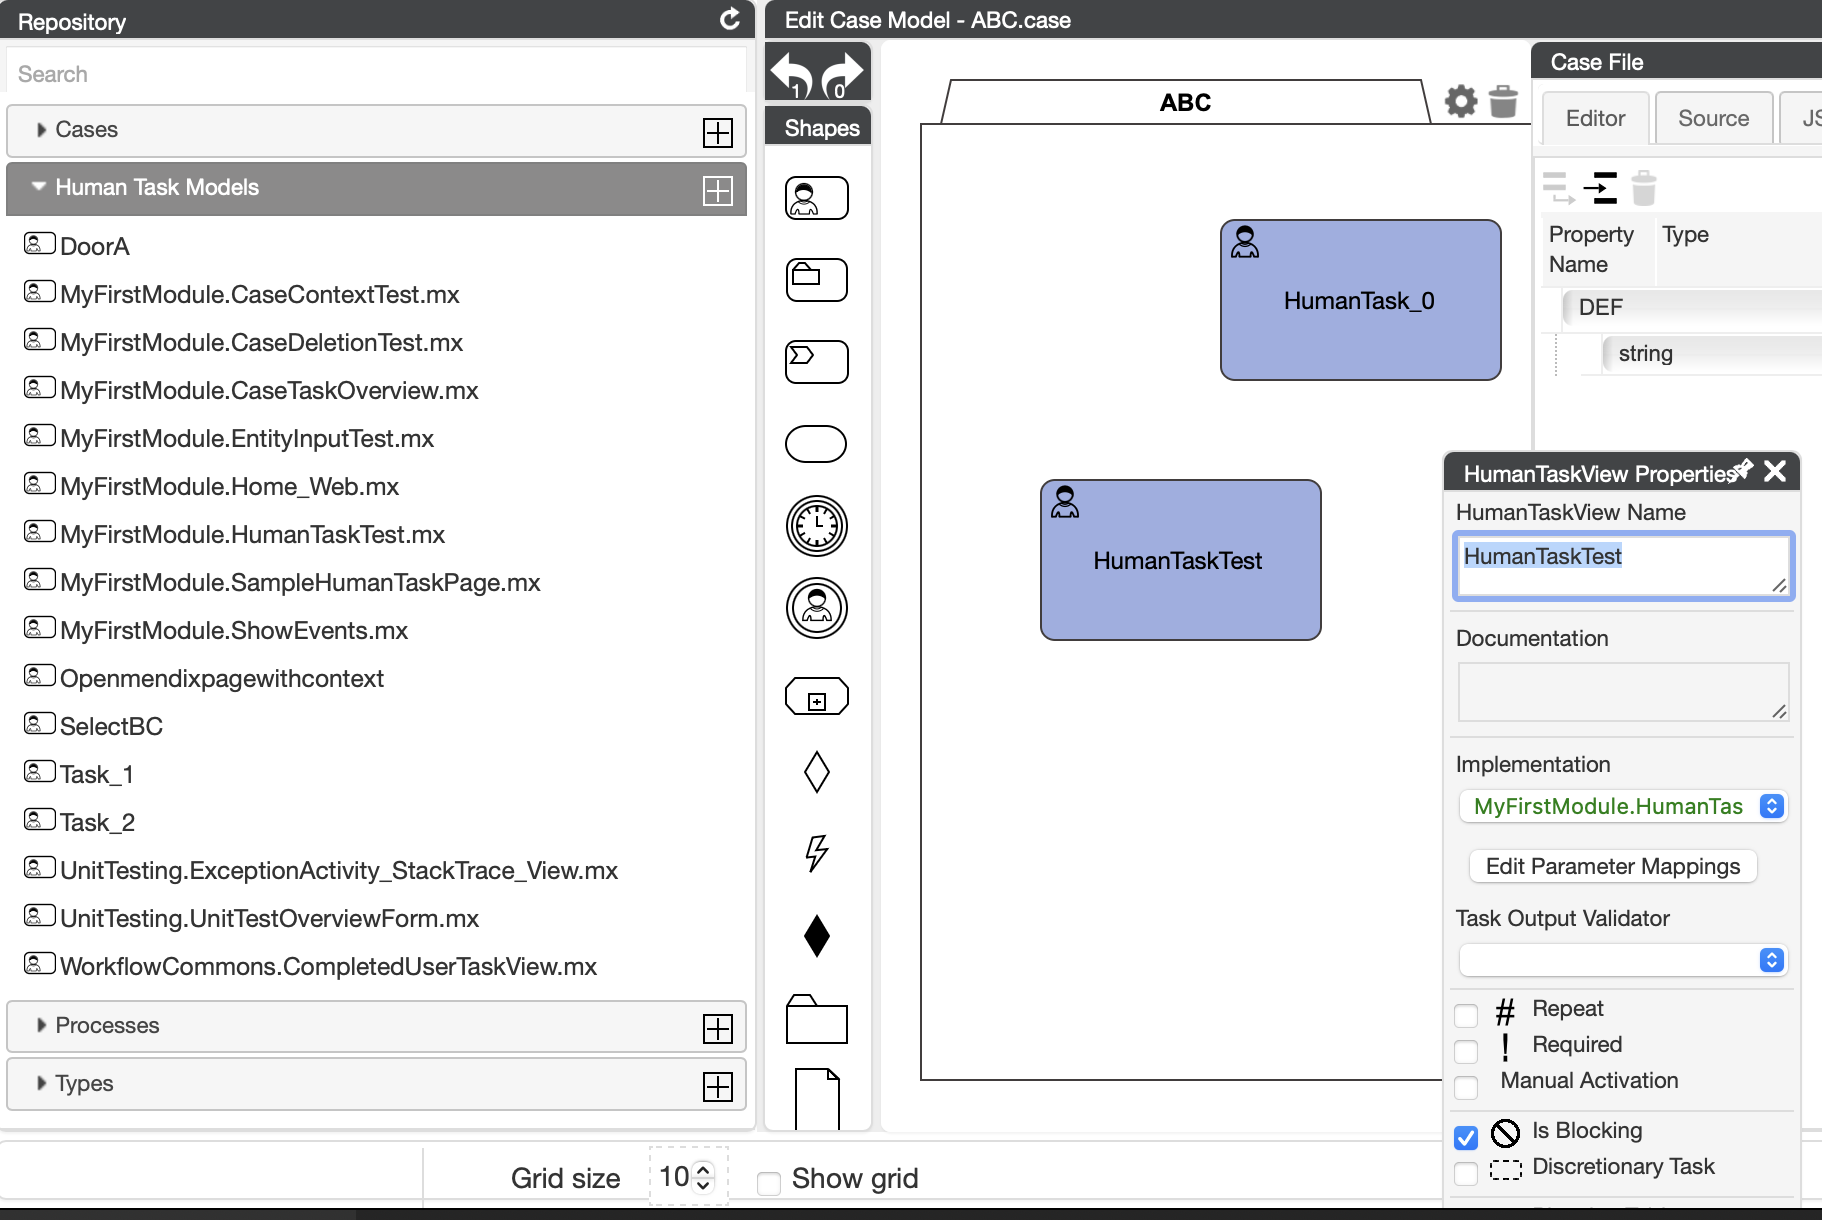
As the modeler cannot see wether a page should be usable as human task page, all pages are listed so you can drag and drop it onto the case model. It automatically creates a input mapping for the parameters defined on the page.
The page as such needs to call the Task java actions to proceed the case.
Using Microflows as Process Tasks
Within the modeler, all created microflows are available to add to your case model.
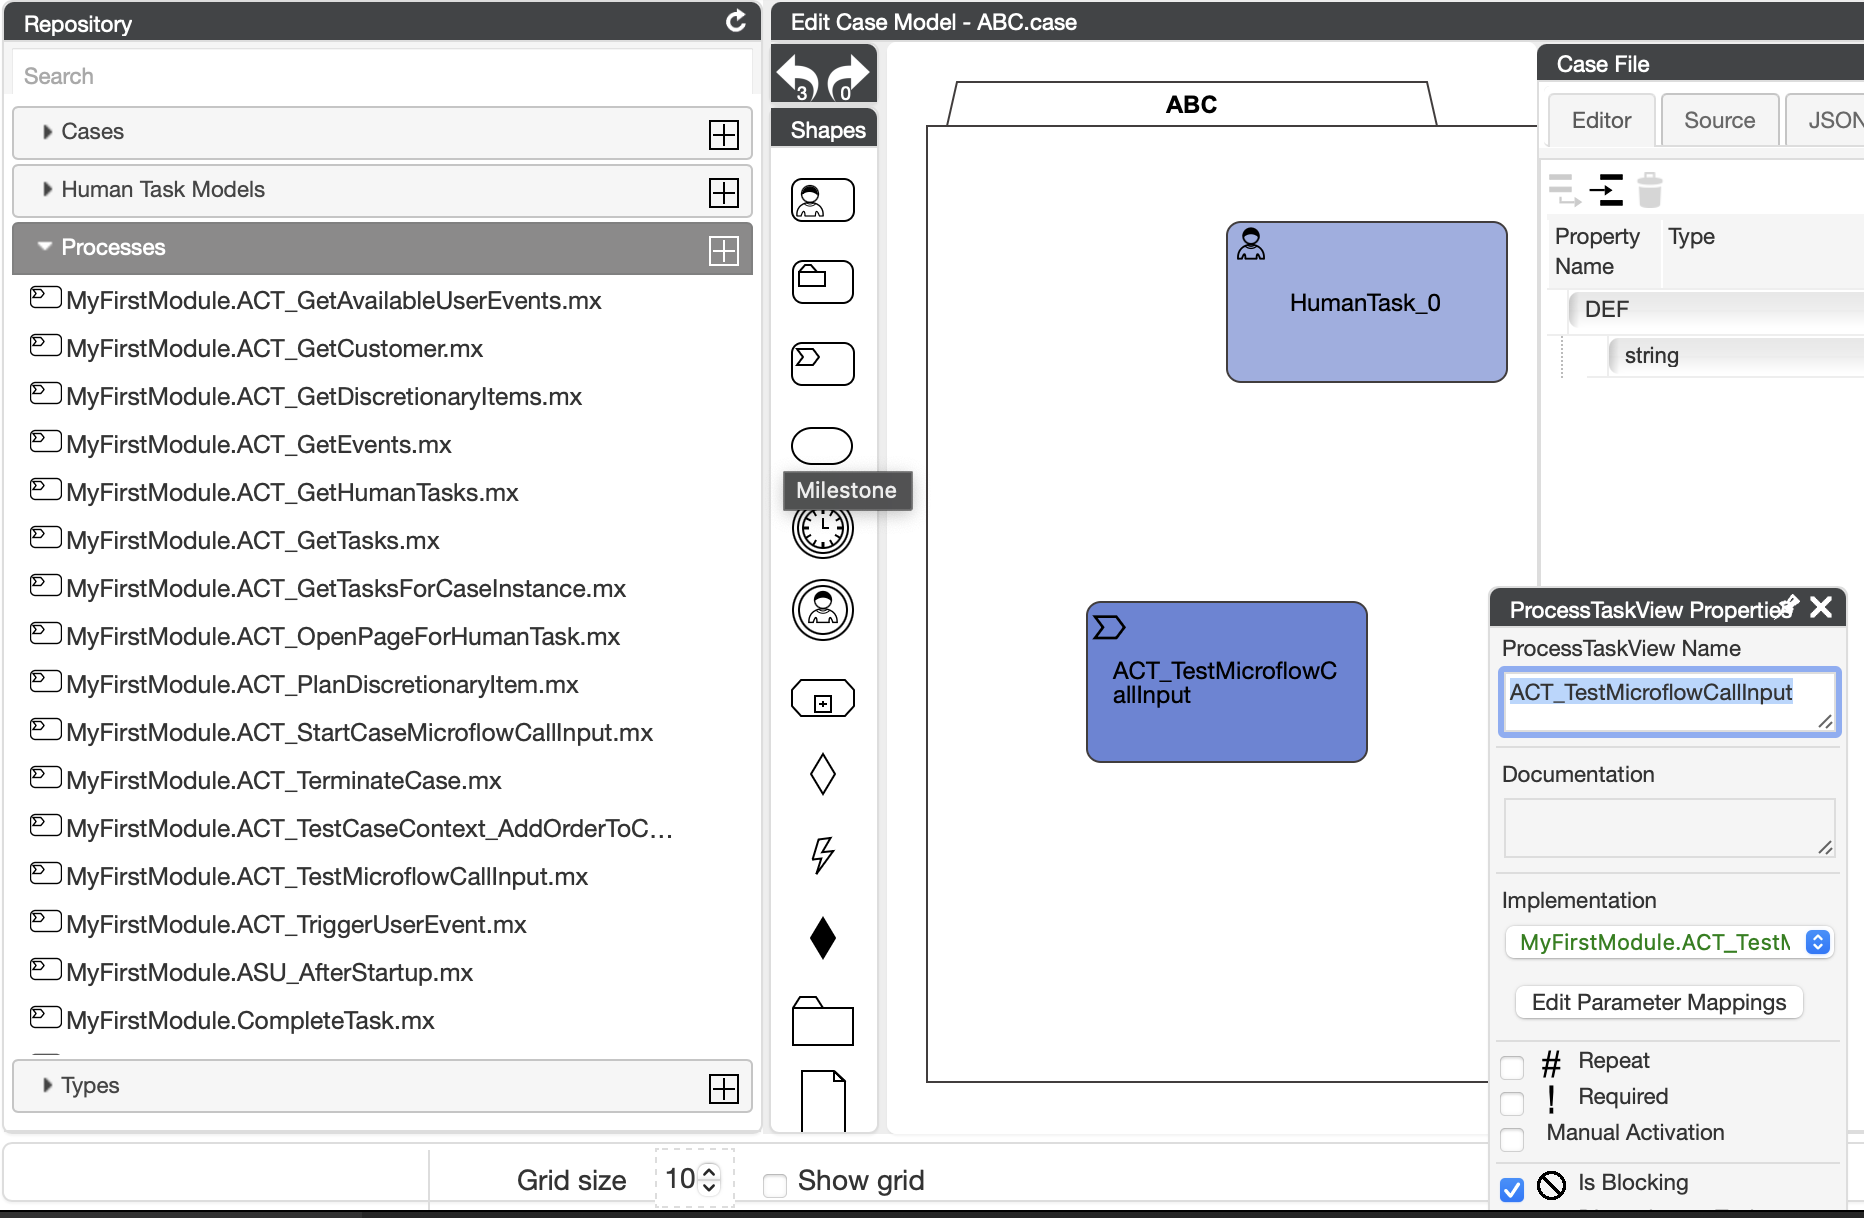
All input and output parameters are mapped to be used with the case file.
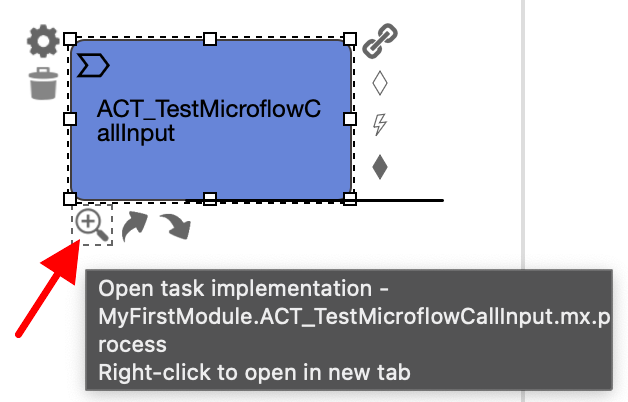
The mapping details of HumanTask and ProcessTask are found by clicking the 🔍 icon of the halo around the task representation (hover over the task)
WaitFor java action
Only continue when the results of a java action are available
The engine is fully asynchronous and the effects of state changes are handled in the background. In order to ease working with the case engine in your app, all java actions that result in state changes return a WaitForTaskToken entity. This entity contains the CaseInstanceId and a correlationId that is used to keep track of all changes inside the case engine.
WaitFor accepts the WaitForTaskToken (and WaitForTaskTokenDiscretionaryItem) and will block to the moment all data is available. You need to use WaitFor in another transaction than the actual java action that result in state changes, otherwise your microflow will stop execution and fail with a timeout.
What to do when you need the results?
For user interactions, create a nanoflow that calls the java action you want todo and thereafter call the WaitFor, see the sample below.
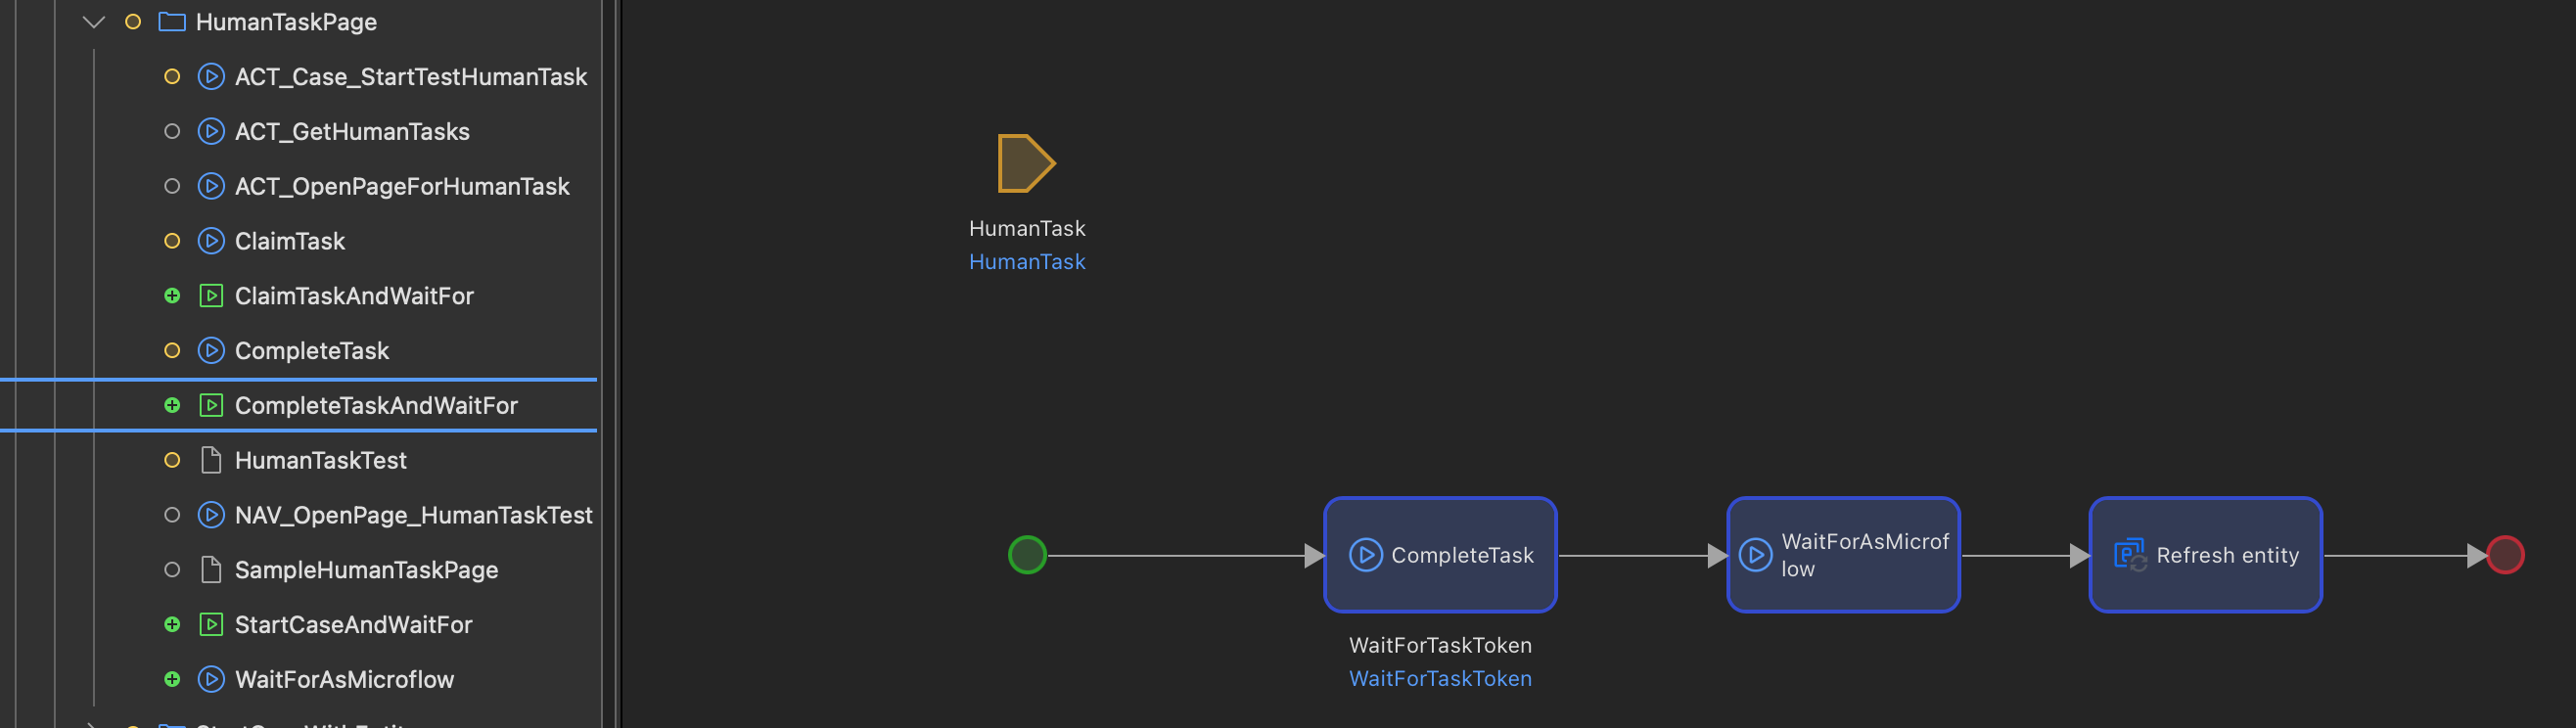
The WaitForMicroflow is a wrapper around the single WaitFor java action.
Note that waiting for direct feedback is only required when you need the outcome of the action in that same session. Starting a java action that ends up with new tasks for other team members dont need that feedback and you can skip waiting for the result, just fire and forget.