
Interact with Cases
Introduction
When you want to make use of your case model within your Mendix app, a number of java actions are available.
First of all, you need to add the DCM Startup Flow to the 'After Startup' App settings in your application. The java action to be added to your startup flow can be found in the toolbox underneath the Case management section and is called 'Case management startup'.
After deploying the model you are able to use the 'Start case' action in order to start execution of the case model deployed.
When the case has started, there will be a WaitForTaskToken including a CaseInstanceId that allows you to interact with that specific case. Next to that, it is possible to fetch and trigger possible available human tasks, milestones, discretionary items and user events. When you need direct (synchronous) interaction with the case, you can use the WaitFor java action to ensure all results are available.
Normally a case instance completes because all required planitems within the case are completed but you have the possibility to terminate (stop) a task or a case.
Events available. The moment you start a case, the case engine keeps track of what happens to the case by storing all events that lead to its current state. You can see it as a repeatable audit log. Next to the events that lead to the current state, Debug events are added that tell you what happened during case instance evaluation (You need to set debug to true when you start a case for this). This is quite helpful when you need to debug your case model.
Deploy the model
Deploying a case works as described but there are some limitations.
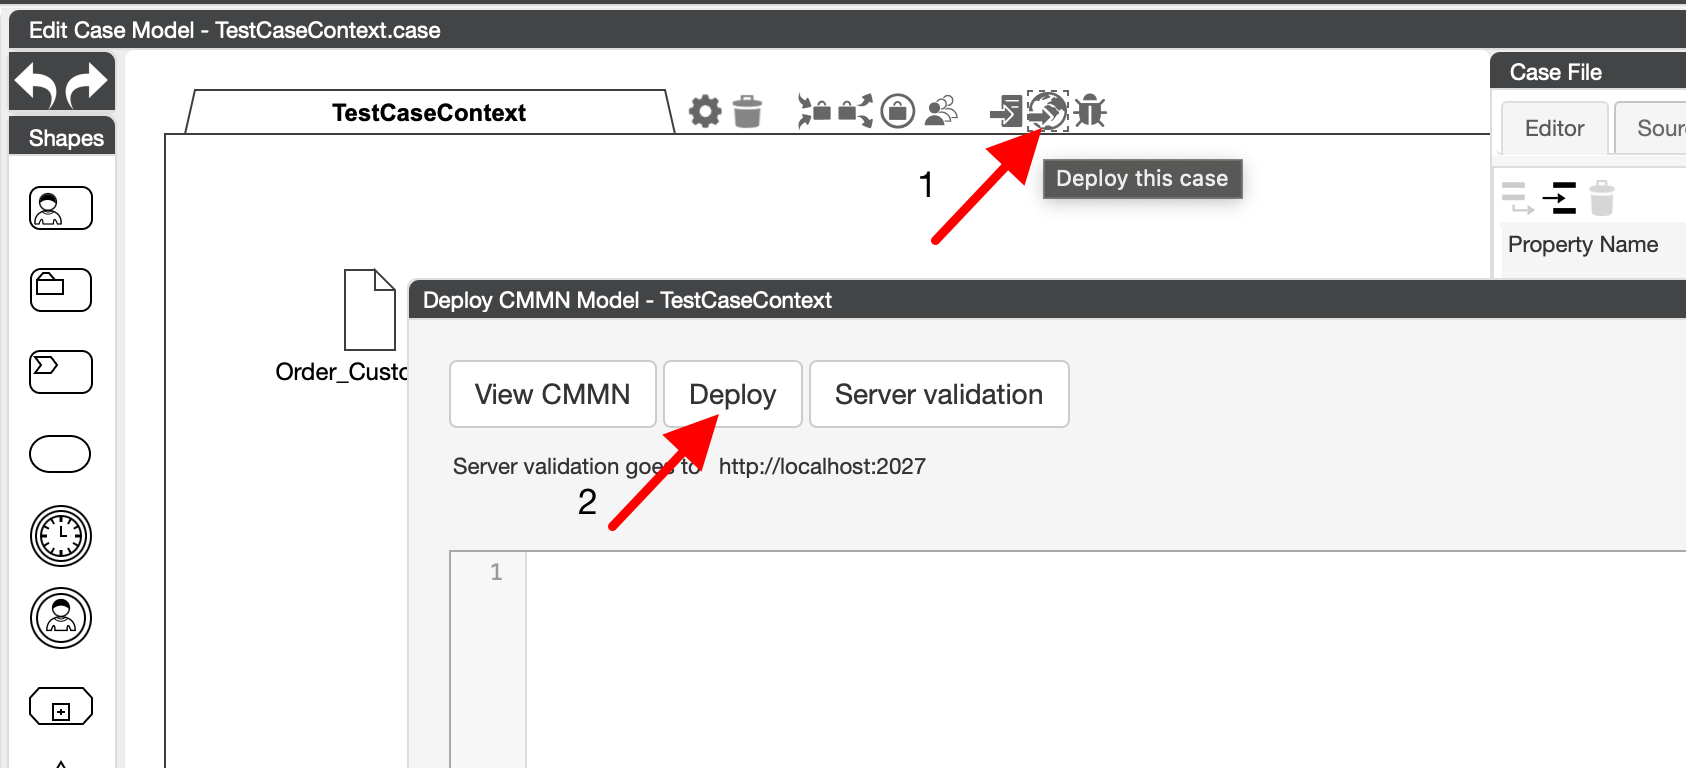 Press 1 to open the deploy screen and press 2 to deploy the case.
The Server Validation button does not work via Studio Pro as it needs a running case engine at this moment.
Deployment writes the files to $PROJECT_ROOT/resources/casemanagement to make it part of the App.
Next to that it is directly written to $PROJECT_ROOT/deployment/model/resources/casemanagement allowing your running
App in Studio Pro to directly use the updated model in a running environment. (Hot Deployment)
You need to use the Deploy option in the Case Modeler - otherwise the case is not available for use
Starting Cases
In order to start a case, you use the 'Start case' action. The start case action expexts some input:
- Case Model
- Input Parameters
- Case Team
The Case Model is the name of the model you have deployed. When its deployed you can find it
in your Mendix project at deployment/model/resources/casemanagement
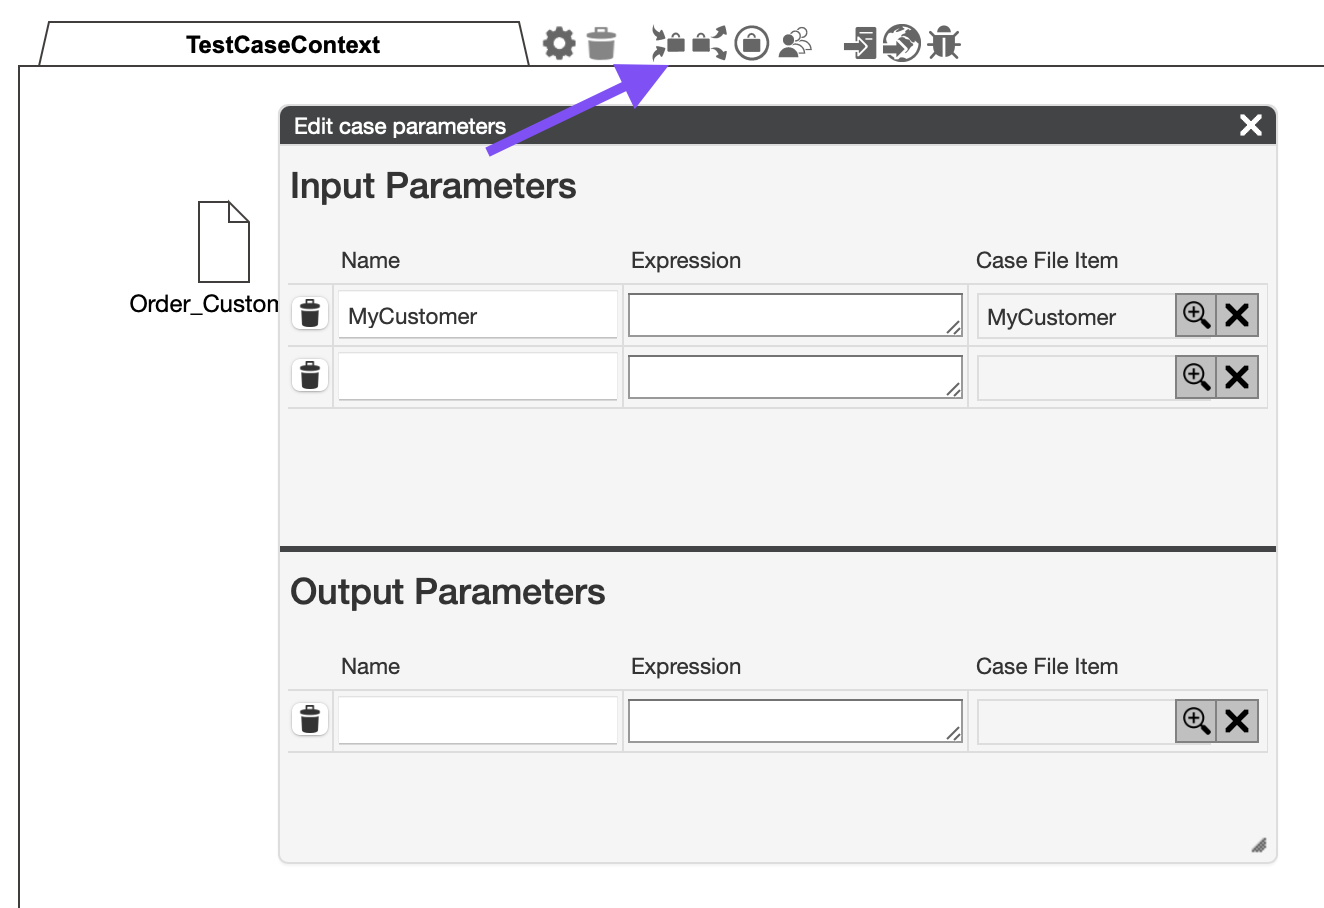
Input Parameters
Input parameters need to be defined at case level
 More details on Parameter Mapping
Input parameters end up as case file items in the case. This is a json structured tree of data specific for the case instance. This input is given via an Entity and its connected associations as designed via the case file structure in the case modeler.
The Case Team
Every case instance, runs with their own team. So when you start a case, you need to specify Mendix users and roles connected to the Case Team This allows these users and/or roles to participate in the proceedings of the specific case instance.
Note that the CaseFabric case team authorizations are more extended. At this moment, only user and role mapping is possible. Its not possible to make use of the Consent Groups.
Fetching and triggering possible next steps (for human interactions)
Now the case is running, you can refer to it with the case instance id. A number of java actions allow you to fetch information on (Human) tasks, user events, milestones and discretionary items. Allowing you to trigger these items to get the case instance proceed its path.
Next to that, you can fetch the case file structure and update it. This maps the internal json based tree towards the Entities involved and after update back to the json tree. In the DCM module, this is called the Case Context or Task Context.
Get a view of what has happened for a specific case instance
The Case Engine is event sourced and it is possible to retrieve all the events of the case instance using the 'GetEvents' java action. This returns a CaseEventList that gives you the type of event and the raw data in a string. The raw data is always a JSON structure that you could map to something specific if you wish.
Note that DEBUG events are also part of this log (when debug is set to true) allowing you to get a view on the internal logic executing an action on your case or human task instance.
Use of the Task Queue
Be aware that all actions that change state, interally use a specific Task Queue. It is not adviced to use an additional Task Queue on top of that.